Presets
Presets help you save a complete set of article instructions so you don’t have to configure the same settings every time you create content. Once created, a preset can be applied to any article to automatically fill in style, structure, media, and linking preferences.
You can create presets in two ways:
From the Presets section in the dashboard, or
By saving your settings as a preset while generating an article
This guide walks you through creating a preset from the Presets dashboard.
Option 1: Create a Preset from the Presets dashboard
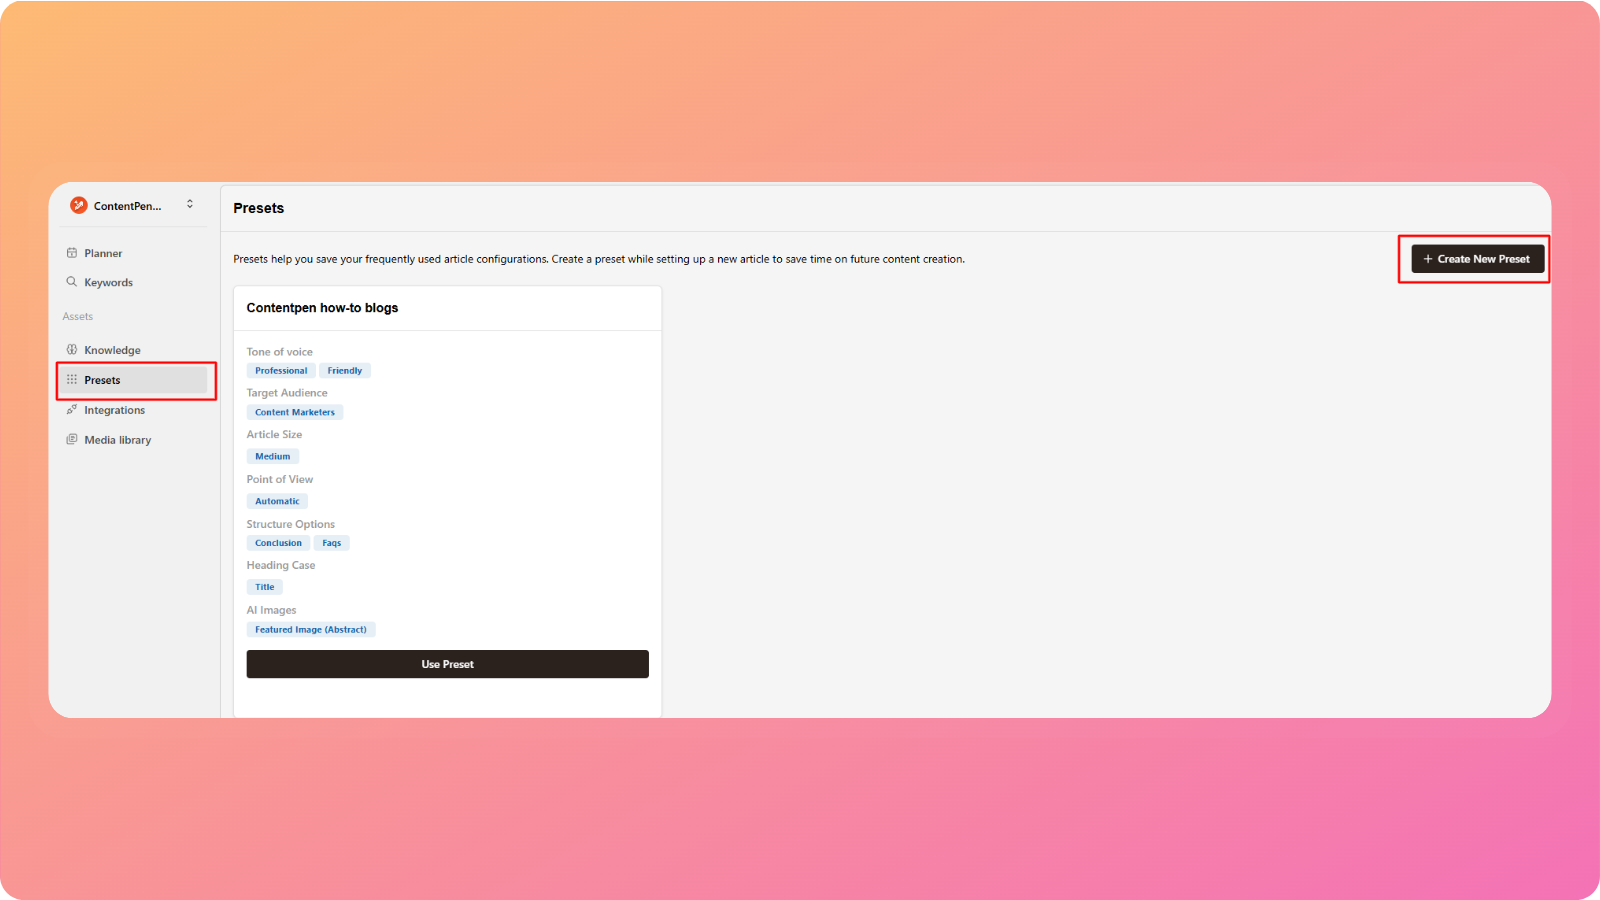
From the left-hand menu, go to Assets → Presets
The Presets dashboard will open, showing any existing presets
Click Create New Preset
Enter a Preset name (for example: “SEO Blog – US Audience”)
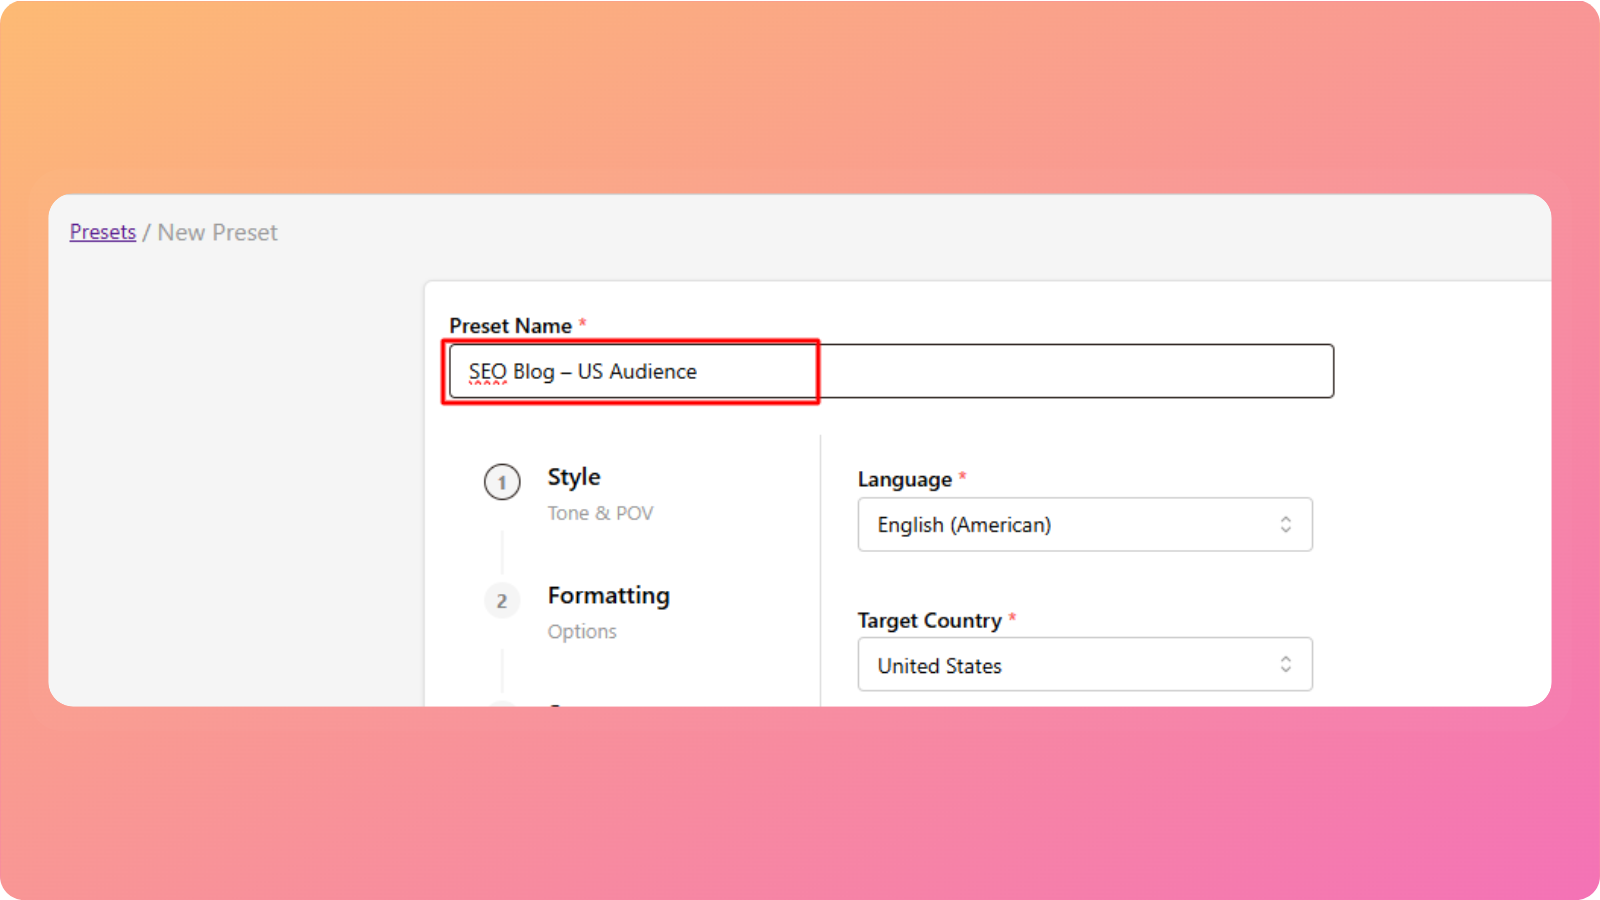
You’ll now be guided through all the preset settings.
Style settings
These settings define how your article sounds and who it’s written for.
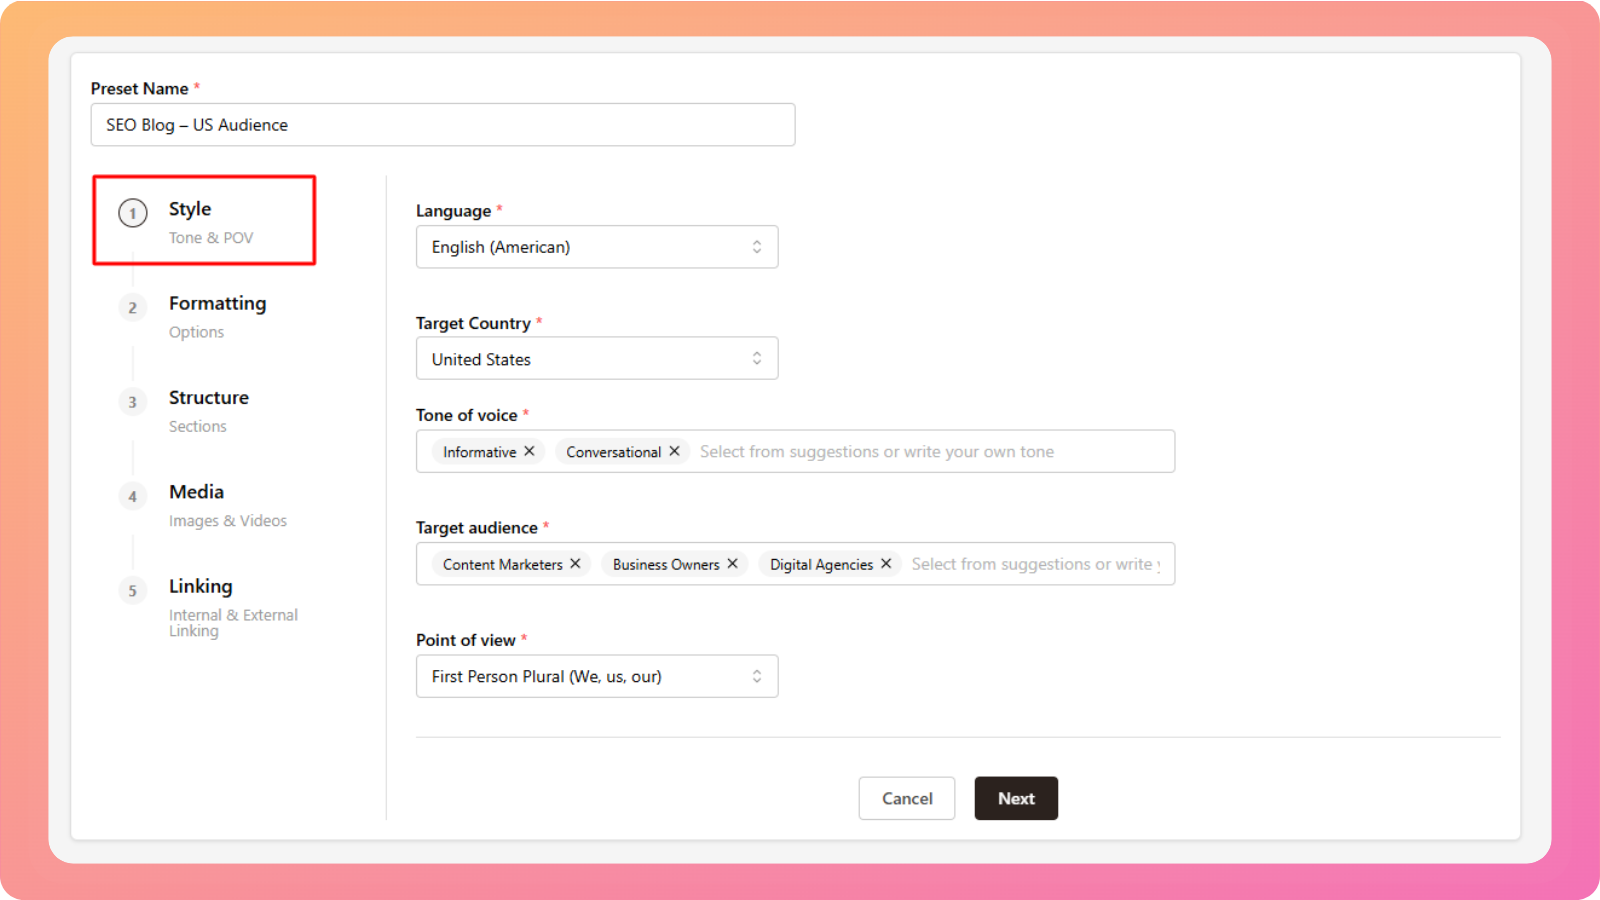
Language
Choose the language you want the article to be written in.
Contentpen supports 15+ languages.
Target country
Select the country you want to target. This helps tailor language usage, spelling, and context.
Tone of voice
This is pre-filled from your workspace settings, but you can edit it for this preset.
Examples include professional, friendly, conversational, or authoritative.
Target audience
Also pre-filled from your workspace. You can customize this to suit a specific reader group.
Point of view
Choose how the article should be written:
Automatic – AI decides what fits best
First person (singular or plural)
Second person (singular or plural)
Formatting settings
These options control how your content looks on the page.
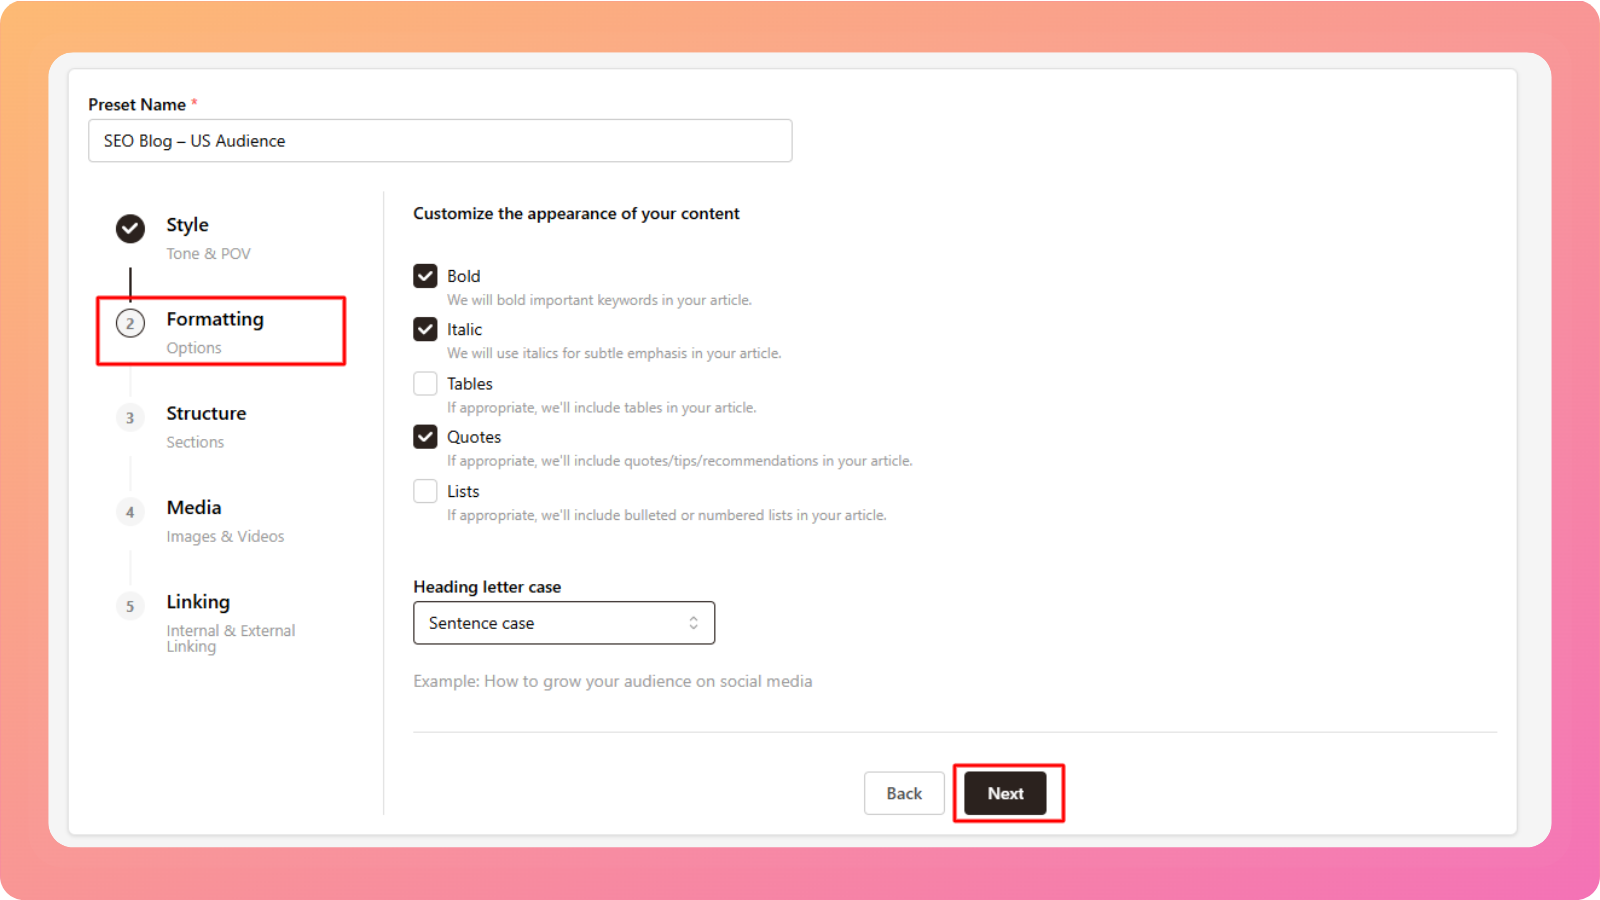
You can choose to:
Bold important keywords
Use italics for subtle emphasis
Include tables when relevant
Add quotes or tips
Use bullet or numbered lists
Heading letter case
Choose how headings appear:
Title case
Sentence case
Lowercase
Unchanged
Structure settings
Structure defines how detailed and long your article will be.
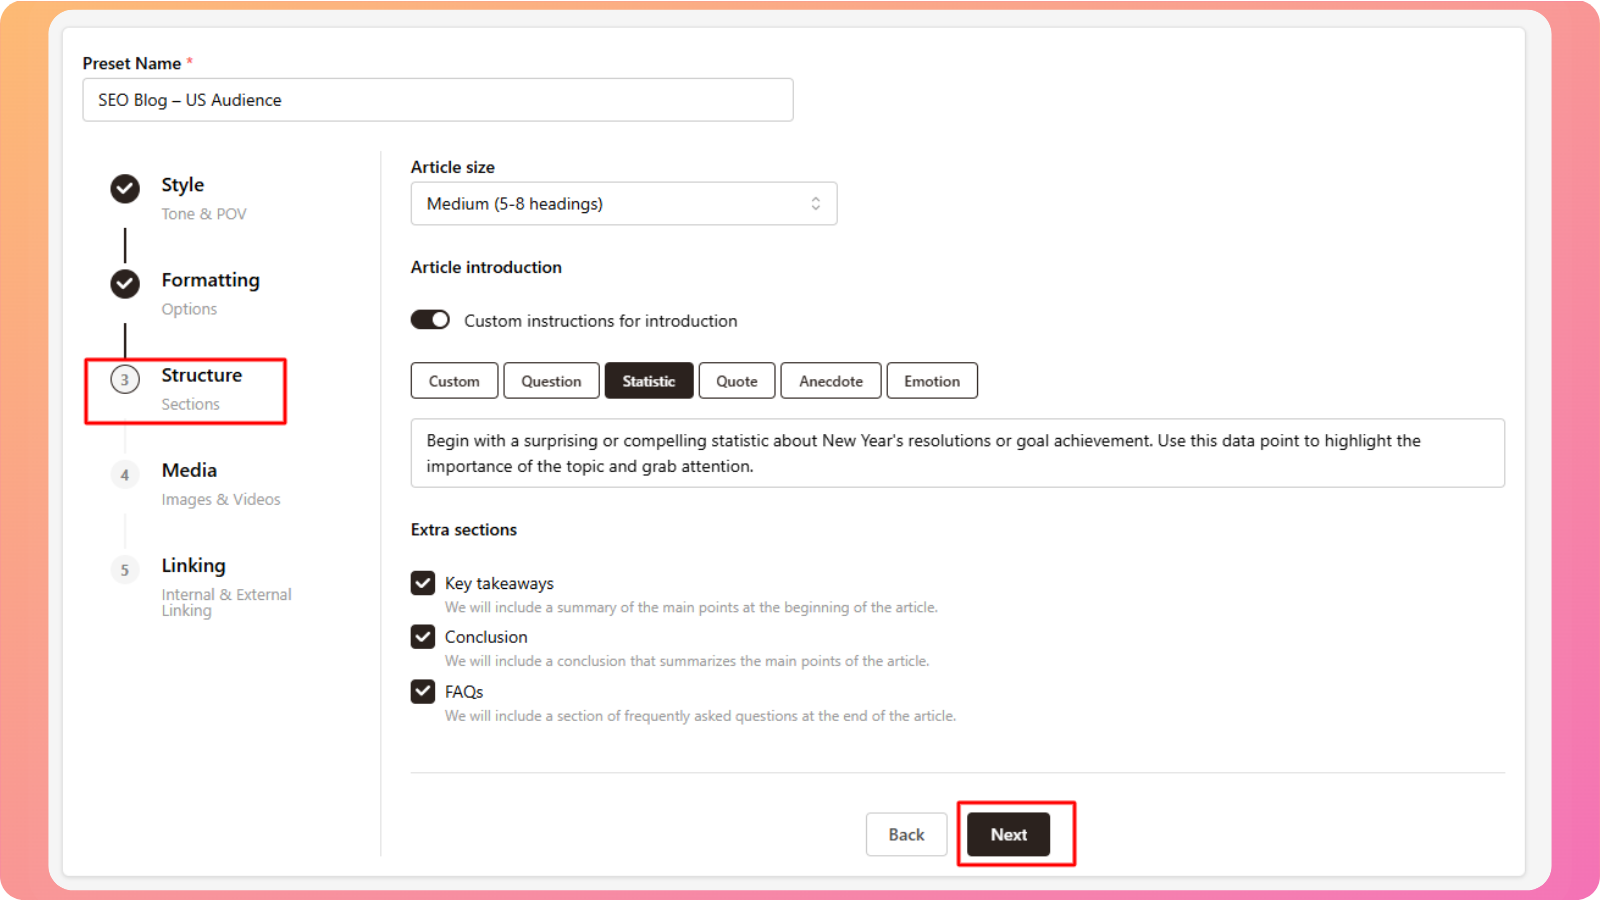
Article size
This controls the number of main sections and overall depth:
Small (3–5 headings) – Best for short posts or quick explanations
Medium (5–8 headings) – Ideal for standard blog articles
Large (8–12 sections) – Suitable for in-depth guides
Very large (12–15 sections) – Best for long-form or pillar content
Introduction style
Choose how the article should begin. You can ask Contentpen to start with:
A question
A statistic
A quote
A short story or anecdote
An emotional hook
You can also add custom instructions if you want a very specific type of introduction.
Extra sections
Add optional sections for better structure:
Key takeaways – Summarizes the main points
Conclusion – Brings the article to a clear close
FAQs – Answers common reader questions
Media settings
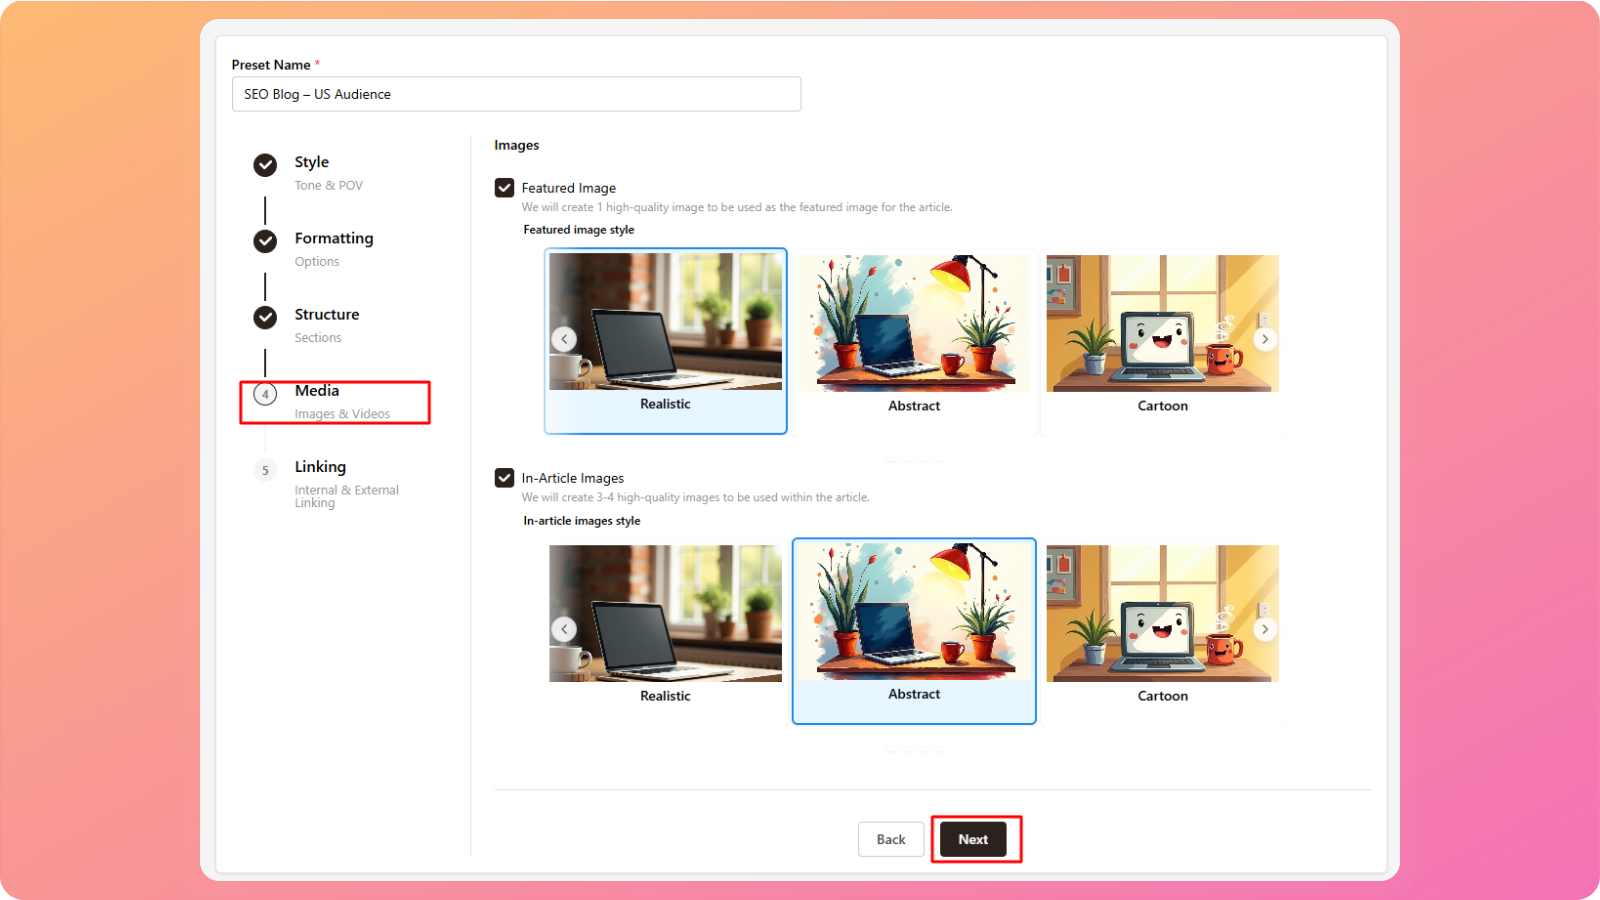
Choose whether Contentpen should generate images for your article.
Featured image – One high-quality image used as the main article image
In-article images – 3–4 relevant images placed inside the content
These images are created automatically and added in the appropriate sections.
Linking settings
Linking helps improve SEO, context, and content quality.
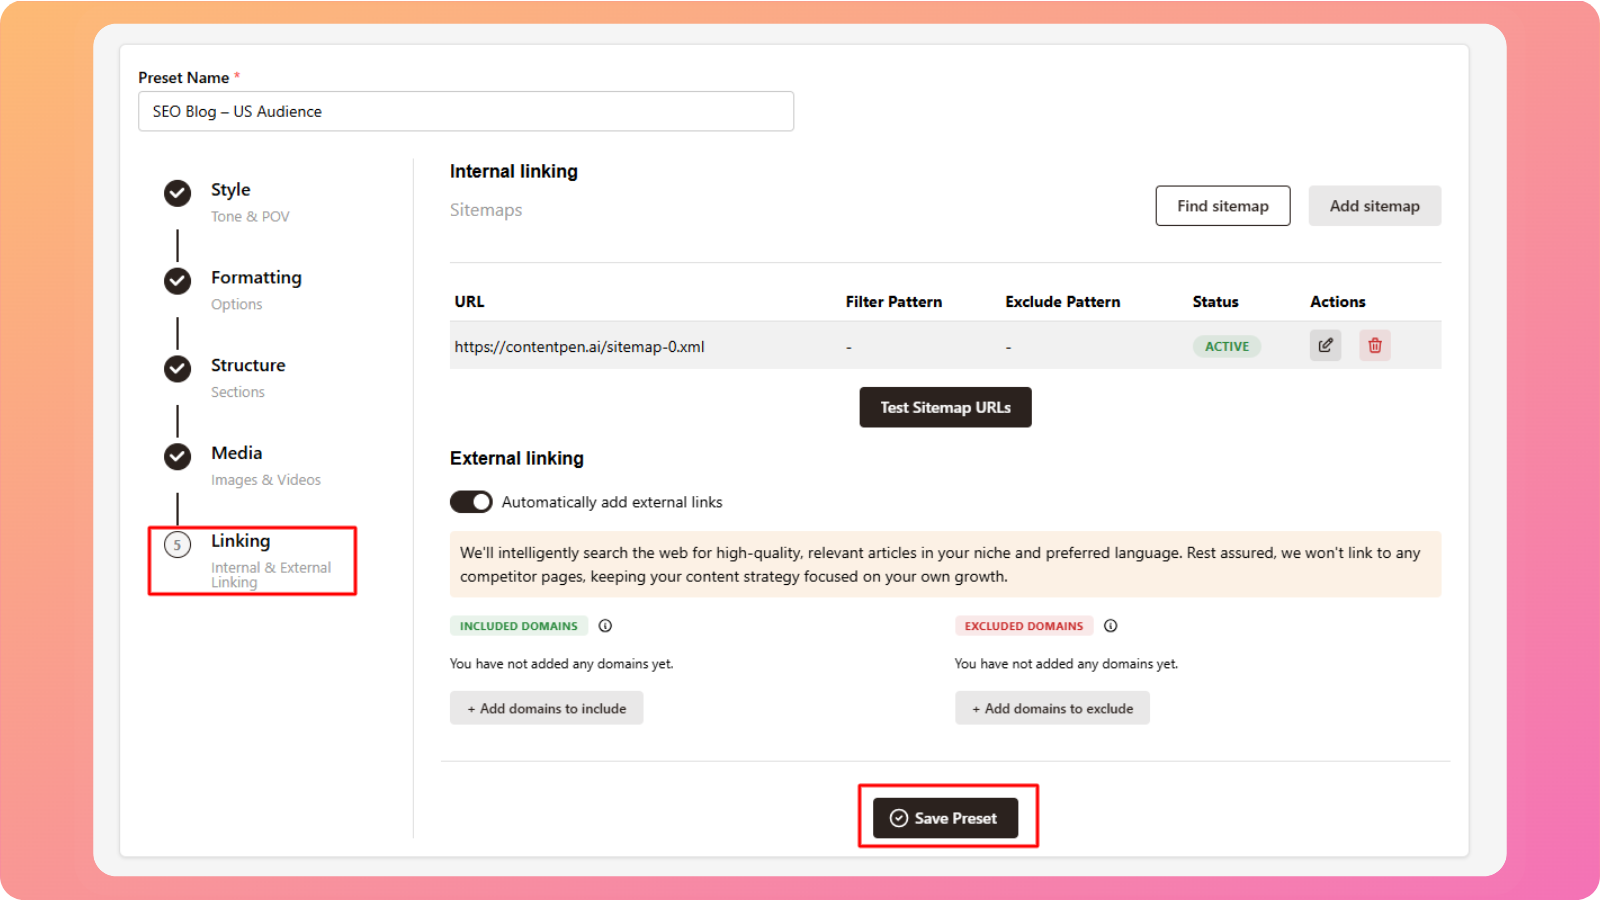
Internal linking
Choose how Contentpen adds links to other pages on your website.
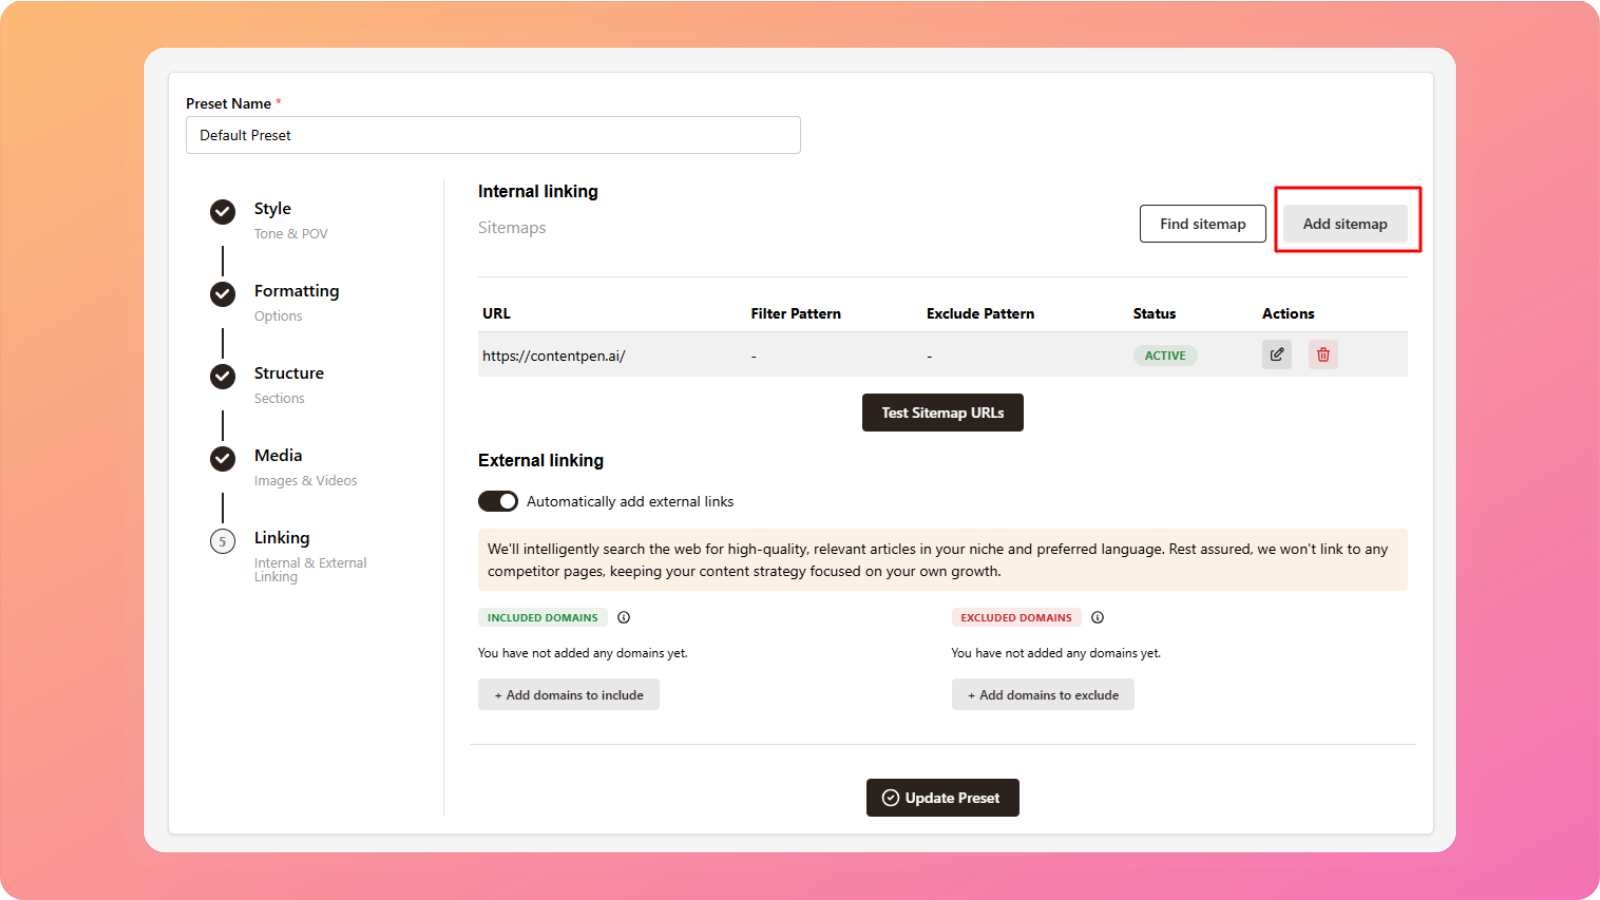
You can:
Let AI find links automatically by scanning your website sitemap, or
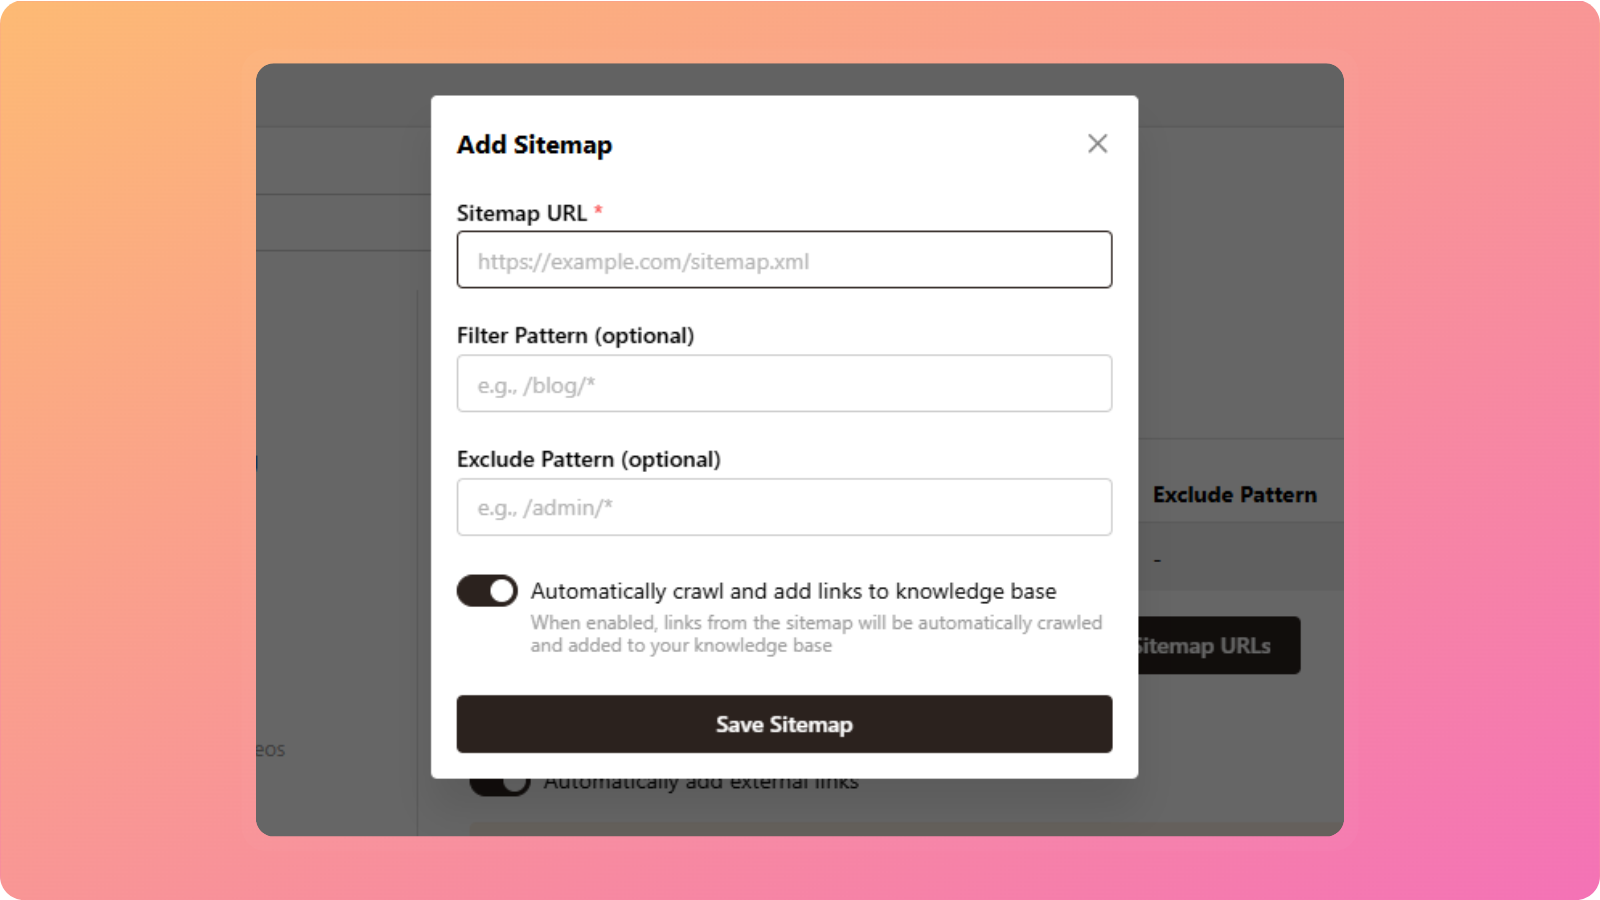
Add a sitemap manually by providing:
Sitemap URL
Filter pattern (optional) – Include only specific URL types
Exclude pattern (optional) – Exclude certain URL types
This ensures internal links remain relevant and controlled.
External linking
Control whether links to external websites are added.
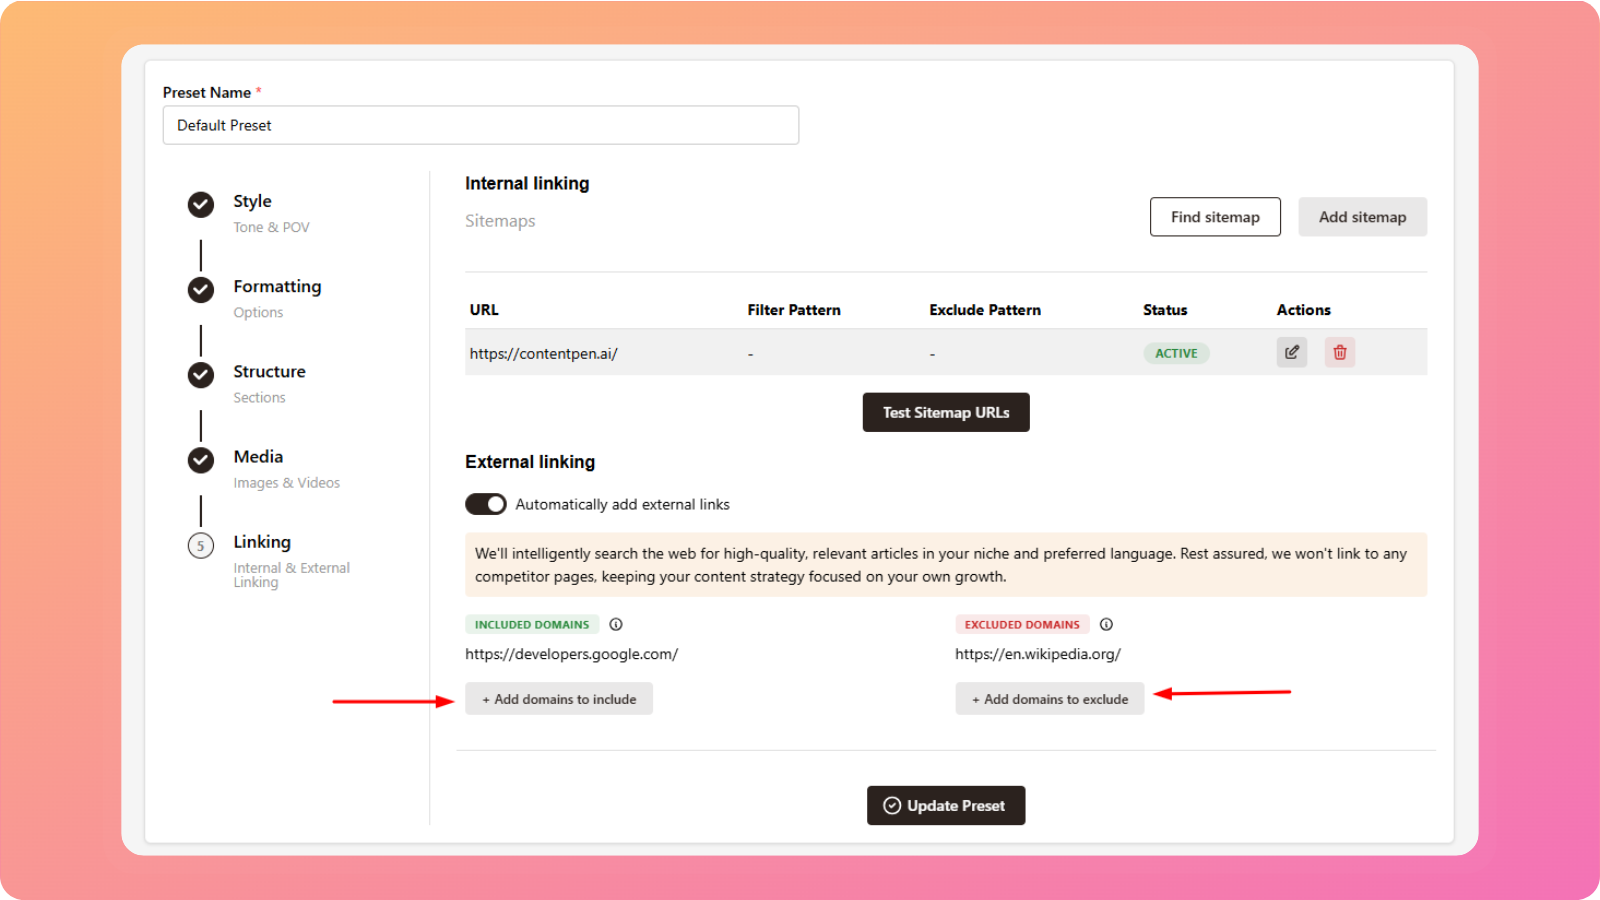
You can:
Toggle automatic external links on or off
Optionally include specific domains
Optionally exclude specific domains
This gives you full control over which external sources appear in your content.
Save your Preset
Once you’ve configured all settings:
Click Save Preset
Your preset will now be available in the preset dropdown during article creation
When selected, all supported fields will be auto-filled instantly.
Option 2: Create a Preset while generating an article
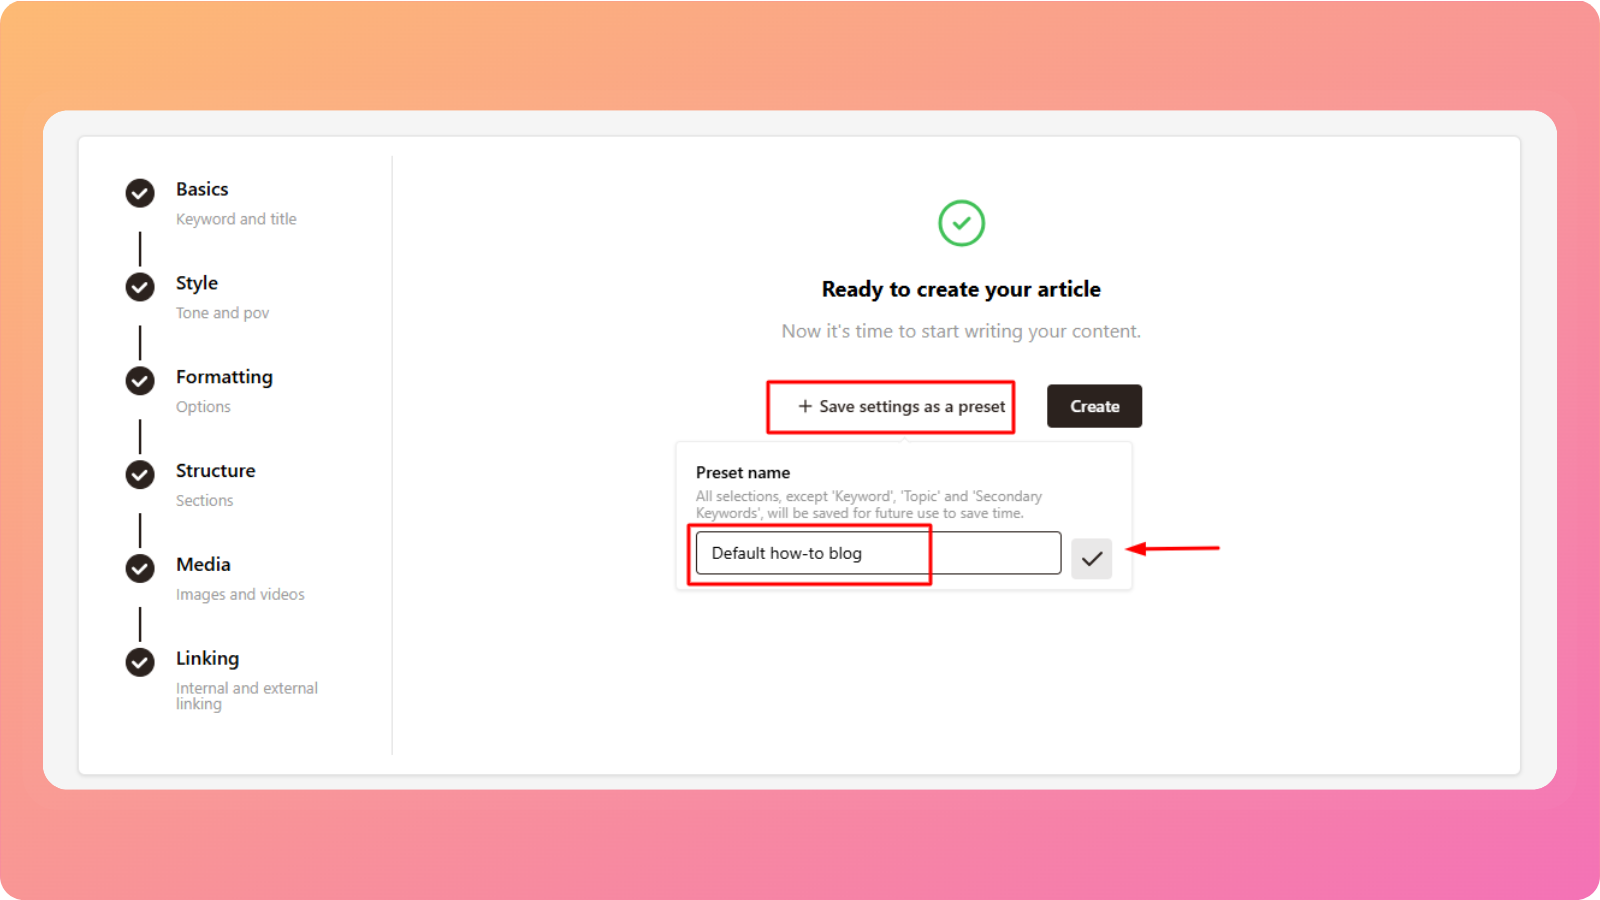
You can also create a preset while setting up an article. After adjusting style, structure, media, and linking options, simply save those settings as a preset to reuse later.
This option is ideal if you discover the perfect setup while creating content.
Presets are designed to save time, ensure consistency, and simplify large-scale content creation. If you need help creating or managing presets, feel free to reach out to our support team, we’re always happy to help.
Was this article helpful?